 |
 |
 |
|
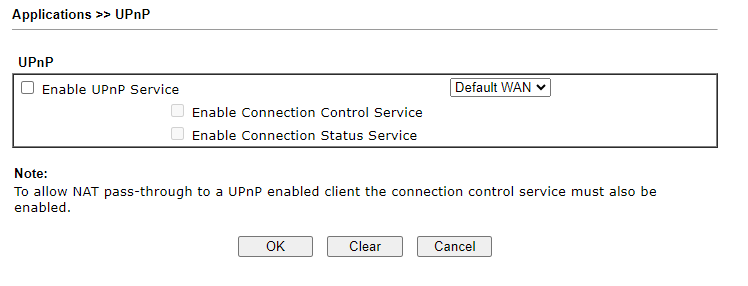
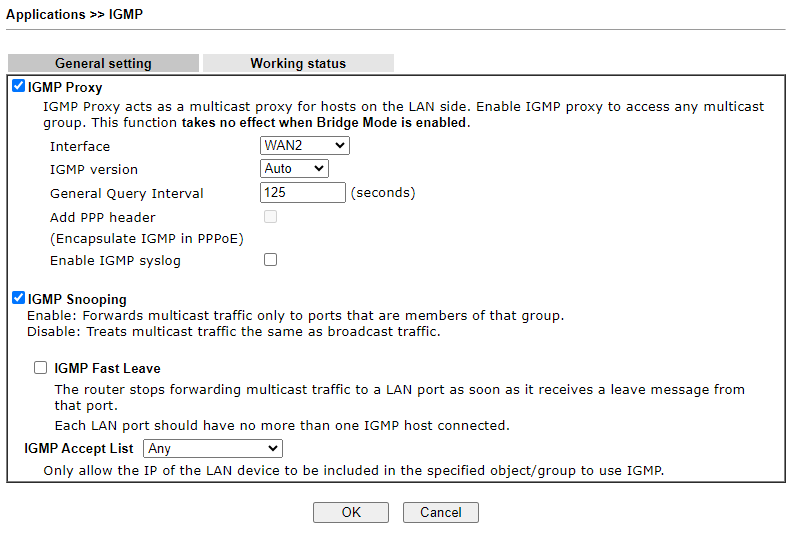
FoggyLogSun May 19th 2024 09:05:31: Draytek Router Configuration for SonosI have a few different Sonos speakers (Play:5, Play:3, Beam, Connect) connected via Ethernet or Wifi. Over the past few months I've been having lots of issues with the Ethernet Play:3's falling off the Sonos network and appearing as not connected, or “Unable to Connect to Product”. This also seemed to sometimes make the Connects and the Wifi Play:3 disappear as well. The Play:5 and the Beam seemed robust and never disappeared. I was wondering if it might be a hardware issue (I had an issue with the PSU inside a Connect previously which seemed to be fixed by reflowing the solder joints), however it was odd that it happened to both Play:3s and not just one. So I started fiddling with settings on my Draytek Vigor 2862 router. I've now concluded that these settings seem to work for me. I don't know if they are right, but they solved the issue!
Make sure the IGMP Proxy is using the right WAN interface. I think my key problem was that I switched from having my internet connection on WAN1 to WAN2 when I upgraded to fiber and I had not changed this setting.
Mon Dec 28th 2020 16:15:01: Door not opening on Panasonic MicrowaveThe door release button on our Panasonic NN-ST479S BPQ microwave has not worked very well for quite a while. You always had to lift the door slightly before it would release. Otherwise the door would not open. Well it turns out it just needed a bit of lubrication. I squirted some Gibbs Brand lubricant in the latch on both the door and the microwave and it was fixed! You could probably also use some silicone spray. I would not recommend WD40 as that is not actually a lubricant (certainly not long term anyway).
Sun Sep 29th 2019 22:07:02: Synology NAS VERY slow to verify drives and data scrubb (Solved)I just migrated from a DS1815+ to a DS1819+ and my 14Tb SHR2 volume needed Data Scrubbing and verifying. This process was happening very slowly.... By my maths it was going to take 50 days to complete (4% in 48 hours). I tried disabling Surveillance Station but that made no difference. Then I noticed that I had a Hyperbackup backup running as well which was taking ages. I stopped all backups and suddenly the verify process is making much better progress!
Tue Aug 6th 2019 19:11:00: Psion Software DownloadsOver the years I've had some emails asking if I still have the old Psion software for connecting a Psion to a PC. Well here is what I have found lying around on my NAS drive. Dates must be the dates I downloaded them from somewhere. Please don't ask me what they all are - they are offered here without support :-)
If you have any nuggets of knowledge, please make a comment below!
Mon Apr 1st 2019 22:18:00: Attaching Dyson to Bosch PSM 100 SanderI've been trying to work out how to attach a Dyson Vacuum cleaner in place of the dust box on a Bosch PSM 100 Sander. There does not seem to be an accessory from Bosch to help with this in a cost effective way. However after a bit of googling I have found a solution! All you need is a Washing Machine Drain Hose and a bit of plumbing. I used Screwfix "Washing Machine Drain Hose 2.5m x 21mm", a "FloPlast Hose Connector" and a Right angle bit of pipe that I already had. The large end of the Hose attaches to the 29mm (OD) pipe out the back of the sander. This matches the ID of the hose perfectly. Then use the plumbing fittings plus a bit of parcel tape to attach to the Dyson. I was sanding down plaster board in preparation for painting so it generated a lot of fine dust. With the Dyson attached most, but not all, the dust was caught. Much less tidying up!
Fogma Home | Previous Entries >>
|
|


